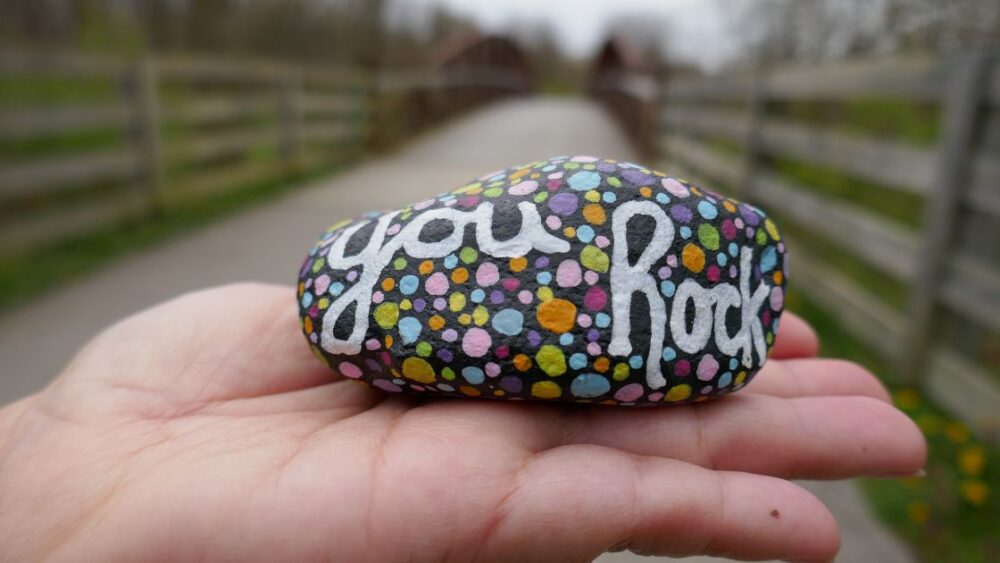
When it comes to adding a touch of personalization and artistry to your garden, few projects are as enjoyable and visually rewarding as painting rocks to adorn your outdoor space. The art of hand-painting rocks is a simple yet creative endeavor that allows you to infuse your garden with color, style, and a unique charm. In this comprehensive guide, we’ll explore the process of “Coloring Your Garden With Hand-Painted Rocks” step by step, and we’ll delve into the benefits, techniques, and creative possibilities that this art form offers.
Introduction: The Artistry of Garden Rock Painting
Gardens have long been cherished as tranquil escapes and places of natural beauty. However, by incorporating hand-painted rocks into your garden, you can take your outdoor haven to the next level. These hand-painted rocks are like miniature, eye-catching sculptures that not only add a personal touch but also serve as focal points and conversation starters.
Gathering Materials: What You’ll Need
Before you dive into the art of rock painting, it’s essential to gather the necessary materials and tools. You’ll require:
Browse our Affiliate Products

- Rocks: The foundation of your project. Look for smooth, clean rocks in various sizes and shapes.
- Paints: High-quality acrylic paints are ideal for rock painting. They offer vibrant colors and adhere well to rock surfaces.
- Brushes: A set of fine and broad brushes, including liner brushes for detailed work.
- Water and Palette: For mixing and thinning paint.
- Sealant: To protect your artwork from the elements.
Check out these affiliate offer below:


Preparing Rocks: The Canvas of Nature
Rocks, while beautiful in their natural state, may need some preparation before you begin painting. Here’s what you should do:
- Cleaning and Drying: Wash the rocks thoroughly and let them dry completely to ensure that the paint adheres well.
- Choosing the Right Rocks: Select rocks that have the right size and shape for your intended design. Larger rocks can accommodate more intricate designs, while smaller ones are perfect for simple motifs.
- Smoothing Rough Edges: If your rocks have sharp or jagged edges, consider using sandpaper to smooth them out. This makes them more comfortable to handle and paint.
Design and Planning: Let Your Imagination Soar
Now that you have your materials and prepared rocks, it’s time to unleash your creativity. Start by sketching your rock design ideas. You can be inspired by various themes, such as flowers, animals, or abstract patterns. Consider the colors and patterns you want to incorporate and think about the overall style you want to achieve in your garden.
Painting Techniques: Bringing Your Vision to Life
To turn your designs into reality, you’ll need to understand some basic painting techniques:
- Base Coats: Begin by applying a base coat to your rocks. This provides a smooth canvas for your design and ensures that the colors appear vibrant.
- Layering Colors: Create depth and dimension by layering colors. Paint the background first, followed by the foreground elements.
- Blending and Shading: Use blending and shading techniques to create a 3D effect on your rocks. This adds depth and realism to your designs.
Step-by-Step Painting Process: From Blank Rock to Artwork
To illustrate the process, let’s go through painting a simple ladybug on a rock as an example:
- Preparation: Gather your materials and select a clean, smooth rock.
- Base Coat: Apply a red base coat to the rock. Let it dry completely.
- Head and Spots: Paint the head of the ladybug with black, and add black spots. Allow the paint to dry between coats.
- Details: Add the eyes and other details with fine brushes and various colors.
- Seal and Protect: Once your ladybug is complete, seal it with a clear, outdoor-grade sealant to protect it from the elements.
Seal and Protect: Preserving Your Masterpieces
Sealing your painted rocks is an important step to ensure the longevity of your garden art. A sealant will protect your creations from fading in the sun, washing away in the rain, or chipping due to weather exposure. Consider using a clear, waterproof, and UV-resistant sealant to keep your rocks looking vibrant and fresh.
Displaying Your Painted Rocks: Garden Artistry
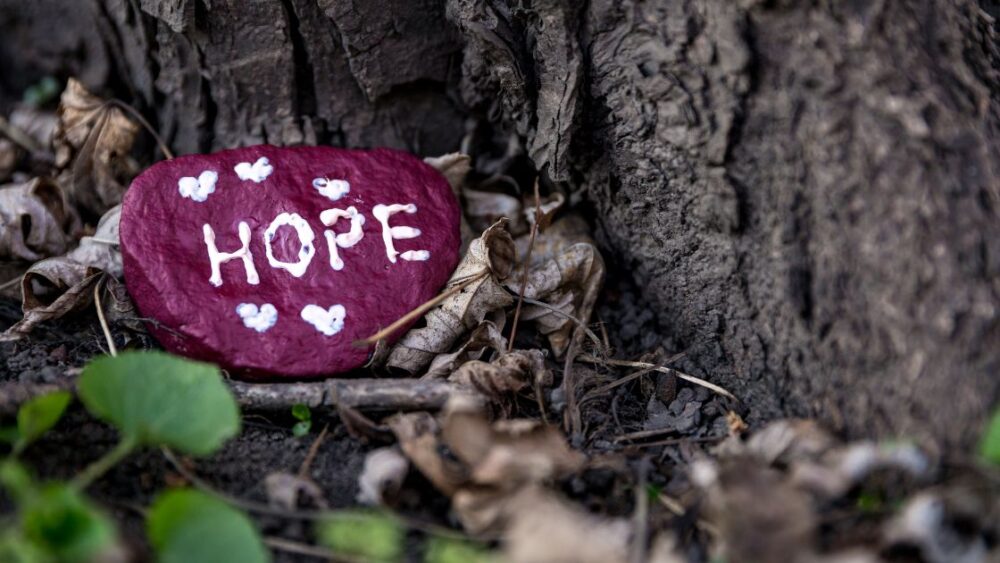
Now that your hand-painted rocks are ready, it’s time to strategically place them in your garden. Here are some tips for displaying your garden rock art:
- Choosing the Right Spots: Position your painted rocks in areas of your garden that could use some color or visual interest. Along pathways, near plants, or around garden borders are great choices.
- Arrangement and Grouping: Group rocks together based on themes or colors. This creates an eye-catching display and a sense of cohesion.
- Creative Arrangements: Consider stacking rocks to create garden cairns or placing them in decorative containers for added appeal.
Maintenance: Keeping Your Rocks Looking Fresh
Over time, your painted rocks may require a little maintenance. To keep them looking vibrant and appealing:
- Caring for Your Rocks: Periodically clean your rocks with a damp cloth to remove dust and debris.
- Refreshing the Sealant: Reapply the sealant as needed to ensure continued protection.
Inspiration and Ideas: Exploring Endless Creativity
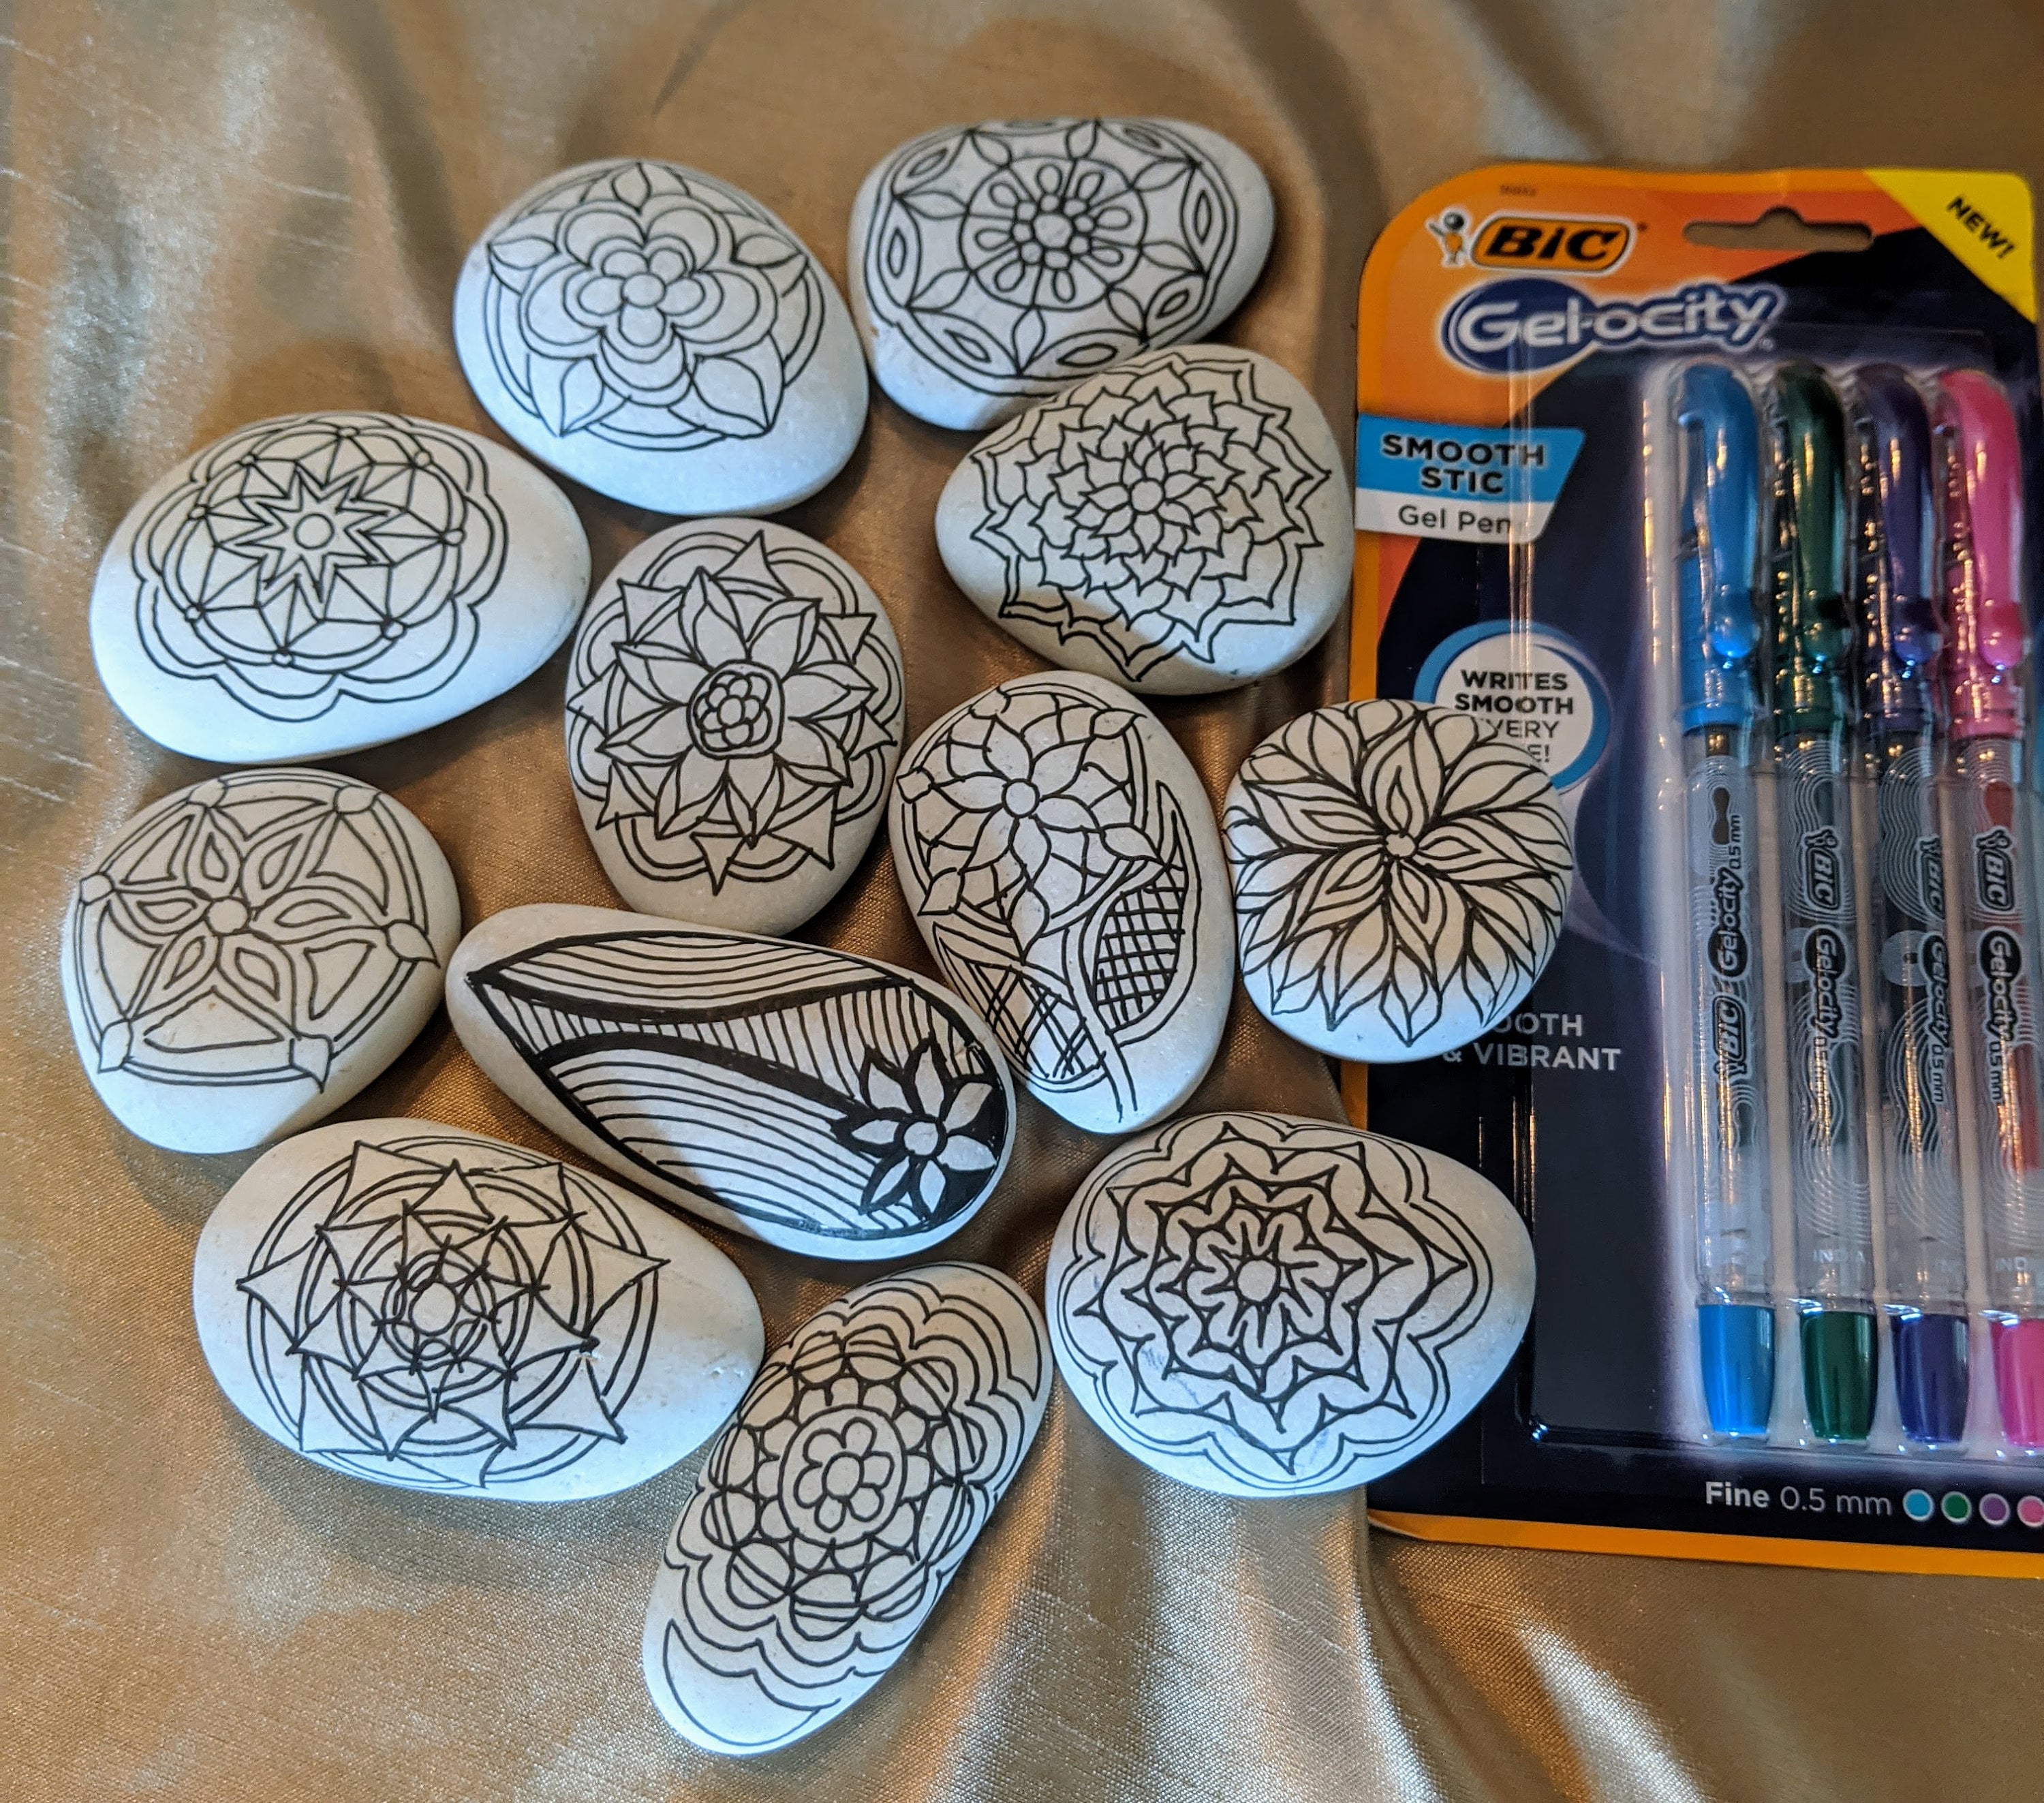
The world of hand-painted rocks is full of inspiration. There are countless themes and styles to explore. Whether you’re into intricate mandalas, cute animals, inspirational quotes, or abstract designs, you’re sure to find endless inspiration for your rock art. Look to nature, art, and online communities for fresh ideas.
Conclusion: A Touch of Creativity in Your Garden
In conclusion, “Coloring Your Garden With Hand-Painted Rocks” is a delightful and fulfilling project that enhances the beauty of your outdoor space. It allows you to express your creativity and bring unique, personalized artistry to your garden. By following the steps outlined in this guide, you can transform ordinary rocks into extraordinary garden accents.
Remember that painting rocks for your garden is not just about the result but the creative process itself. So, gather your materials, let your imagination flow, and start adding a colorful and artistic touch to your garden today. With hand-painted rocks, you can truly make your outdoor space your masterpiece.
Additional Resources: Dive Deeper Into Rock Painting
For further inspiration and tips, consider exploring these additional resources:
- Books on rock painting
- Online rock painting communities and forums
- Art supply stores for paint and brushes
- Nature walks for rock-hunting adventures
With these resources, you’ll find ample opportunities to learn and grow as a garden rock artist. Embrace the joy of painting, and watch your garden come to life with hand-painted rocks.